Part 3 — How to Dye Marabou Feathers: Step-By-Step Professional Dyeing Process
Dye marabou feathers step by step process work is what separates consistent, professional results from a one-off lucky batch — the exact production workflow, start to finish.
Dye Marabou Feathers Step by Step Process: The Full Workflow
Learning how to dye marabou feathers consistently requires a controlled, repeatable system. This is the exact production workflow used to achieve even penetration, stable bonding, preserved softness, and reliable on-the-water performance.
Consistency is not achieved by guesswork — it is measured.
1. Workspace Setup for How to Dye Marabou Feathers Correctly
Professional dyeing requires a controlled environment.
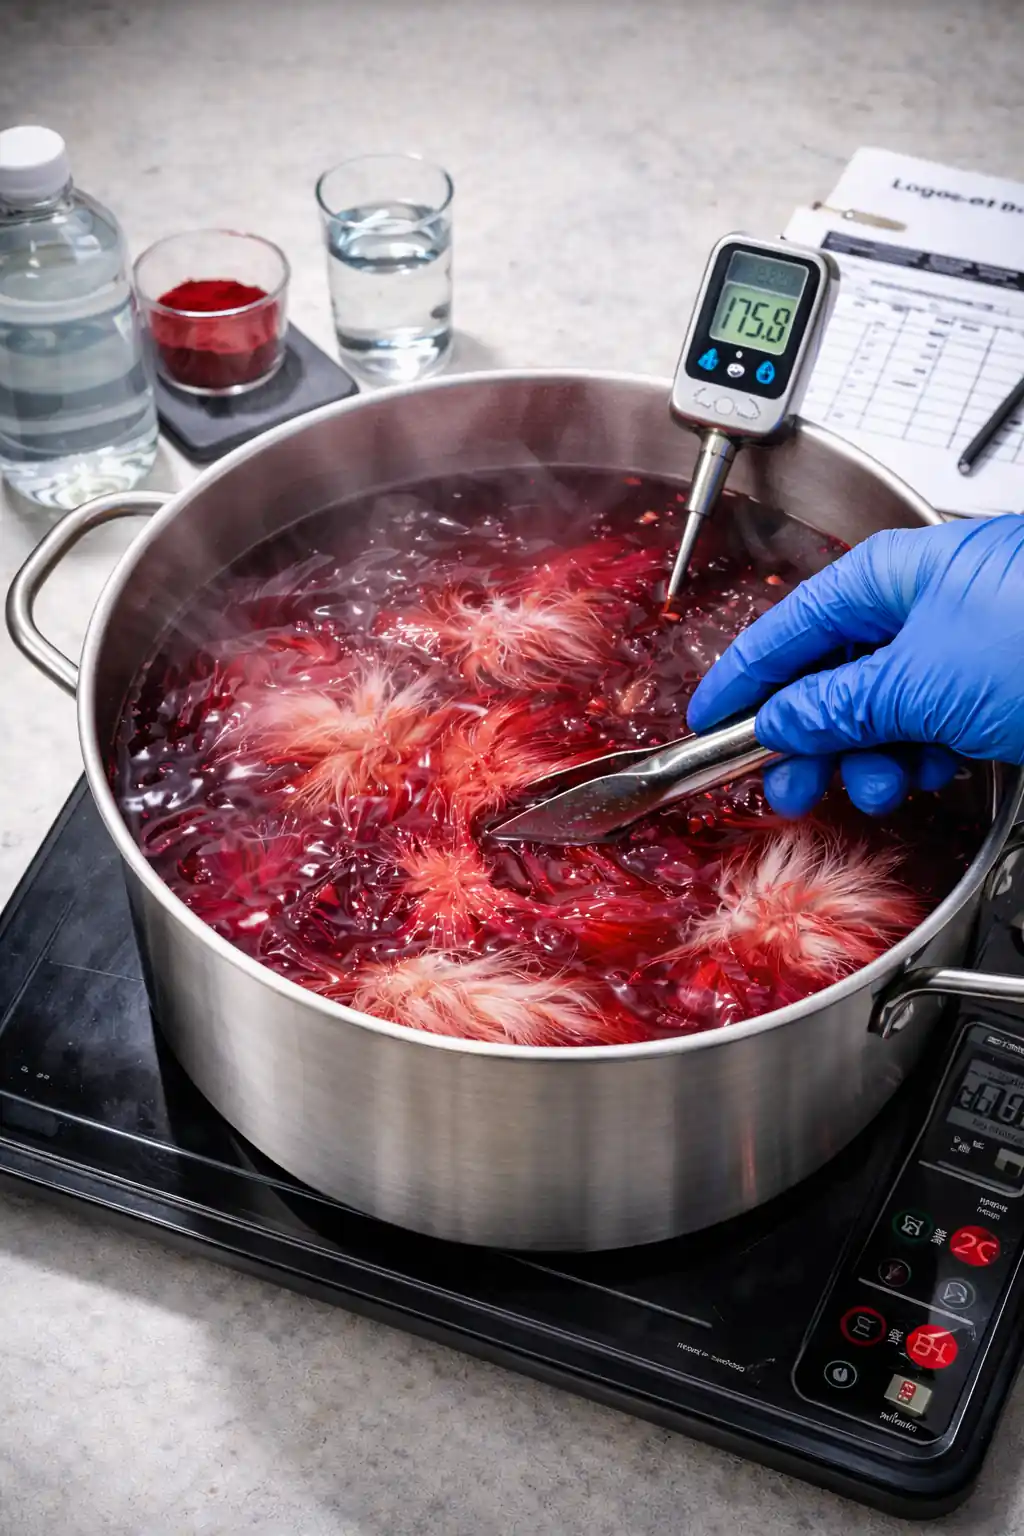
Required equipment: Stainless steel dye pot (non-reactive), dedicated adjustable hot plate, digital thermometer (±1°F accuracy), digital pH meter or high-quality test strips, gram scale (0.1g resolution minimum), measuring syringe or graduated cylinder (for acid), non-reactive stirring utensil, timer, batch log sheet, distilled water only.
Avoid aluminum or reactive metals — mineral contamination or chemical reactions interfere with bonding and color consistency.
2. Measuring Dye Precisely
When learning how to dye marabou feathers professionally, dye must be weighed — never estimated. Place empty container on gram scale, tare to zero, add dye slowly to target weight, record in batch log. Never measure dye by spoon volume — powder density varies by manufacturer and humidity. Precision here determines depth and repeatability.
3. Water Volume to Dye Ratios
Standard Production Example
- 1-gallon distilled water (3.78 liters)
- 4 grams acid dye | 22 ml white vinegar (5%)
- Target pH: 4.3 | Target temperature: 175°F | Bonding time: 30 minutes
- Lighter tones: 2–3 grams per gallon | Deeper tones: 5–6 grams per gallon
4. Acid Ratio Calculations
Acid enables ionic bonding to keratin. For 1-gallon distilled water: 20–25 ml white vinegar (5%) OR 2–4 grams dissolved citric acid. Always verify with a pH meter.
- Target pH: 4.2–4.5 | Acceptable drift: ±0.3
- Below 4.0: Dye strikes too quickly, surface darkening, uneven interior penetration
- Above 5.0: Bonding weakens, color appears dull, durability decreases
5. Heating Sequence in How to Dye Marabou Feathers
Heat activates bonding. Excess heat damages protein structure.
- Add distilled water to pot
- Add measured dye and dissolve fully
- Add acid and confirm pH
- Gradually increase heat
- Stabilize at 170–180°F before full bonding phase
- Target range: 170–180°F (77–82°C) | Stabilized tolerance: ±2°F | Maximum swing: 4°F
- Above 185°F: Keratin begins denaturing, fibers stiffen, natural breathing action is reduced
- Never boil marabou
6. Submerging Feathers Properly
Submersion timing directly affects absorption. Submerge feathers immediately after the final rinse of the degreasing cycle — before the marabou has dried. Gently open clumps, lower fully into bath, ensure stems are completely submerged, do not compress fibers against the pot wall. Dry feathers absorb unevenly. Damp fibers promote uniform dye migration.
7. Agitation Technique
Stir gently every 60–90 seconds. Lift and rotate feather bundles. Avoid whipping or aggressive stirring. Allow fibers to move freely. Too much agitation causes tangling and matting. Too little produces uneven saturation.
8. Monitoring Absorption
- Typical bonding duration: 20–40 minutes | Standard production target: 30 minutes | Allowable variance: ±5 minutes
- Indicators of full absorption: Dye bath becomes noticeably lighter, minimal free dye remains, feather tone appears uniform stem to tip
- Do not extend time to “force” depth — overexposure increases stiffness without improving penetration
9. Rinse Protocol
- Remove feathers from bath
- Rinse in warm distilled water (~100°F) for 30–60 seconds
- Gently squeeze excess water (do not twist)
- Inspect rinse water for bleed
- Pass criteria: No visible dye bleed, no noticeable fade, even tone intact
- Bleeding indicates incomplete fixation
10. Drying Without Matting
Hang vertically or lay flat on mesh rack. Allow air circulation on all sides. Do not pile or compress. Avoid direct heat sources. Allow room temperature drying. Optional: light finger separation while damp. Proper drying preserves breathing action and collapse on pause — critical for cold water and slow presentations.
Tolerance Windows for How to Dye Marabou Feathers Consistently
- Temperature tolerance: ±2°F once stabilized | Maximum swing: 4°F
- Target pH range: 4.2–4.5 | Acceptable drift: ±0.3
- Bonding time variance: ±5 minutes
Exceeding these limits increases risk of uneven saturation, stiffness, reduced separation, and inconsistent performance. Measured control produces predictable movement. Uncontrolled variance produces unpredictable results.
Why This System Matters When Learning How to Dye Marabou Feathers
Small chemistry errors show up immediately on the water. Slight overheating reduces breathing action. Excess dwell stiffens barbs. pH imbalance causes uneven fade. Controlled dyeing produces marabou that pulses under minimal rod movement, maintains fiber separation, displays consistent tone, and holds durability after repeated use.
For a deeper explanation of acid bonding, pH adjustment, temperature activation, and fixation chemistry, review Part 2 — How to Dye Marabou Feathers: Dye Chemistry Made Simple (But Accurate). Understanding the chemistry ensures the step-by-step system above remains controlled and repeatable.
Next — Part 4: Color Formulation & Custom Recipes
Frequently Asked Questions About the Marabou Dyeing Process
Why does workspace setup matter before I even start dyeing?
A disorganized workspace leads to timing errors — feathers sitting too long between steps, dye measured incorrectly under pressure, or temperature drifting while you search for equipment. Setting up everything you need beforehand keeps the process moving at the pace the chemistry actually requires.
How precise does dye measurement really need to be?
Precise enough to repeat. A kitchen scale accurate to a tenth of a gram is worth the investment if you’re trying to reproduce a color across multiple batches — small measurement differences compound into visibly different shades once you scale up water volume.
What happens if I skip the agitation step?
Without proper agitation, dye distributes unevenly across the feathers in the bath, leading to blotchy patches and inconsistent color between feathers dyed in the same batch. Agitation keeps fresh dye solution moving past every fiber instead of settling and exhausting locally.
How do I know if my feathers are drying without matting?
Properly dried marabou separates easily by hand into individual barbs with natural movement, rather than clumping into a stiff, felted mass. If fibers stick together after drying, it usually points back to a rinse or drying step that didn’t fully clear residual dye or moisture.