Part 5 — How to Dye Marabou Feathers: Advanced Techniques for Precision and Control
Dye marabou feathers advanced techniques take you beyond material control, chemistry, and formulation into precision manipulation — layered color, controlled bleaching, and industrial-scale consistency.
Dye Marabou Feathers Advanced Techniques: Precision Manipulation Methods
Introduction
Once you understand material control, chemistry, and formulation, the next level in how to dye marabou feathers is precision manipulation. Advanced dyeing is not about brighter color. It is about controlled structure, layered depth, and repeatable visual effects without sacrificing softness or movement. This section separates hobby-level dyeing from professional production standards.
Advanced Methods in How to Dye Marabou Feathers for Professional Results
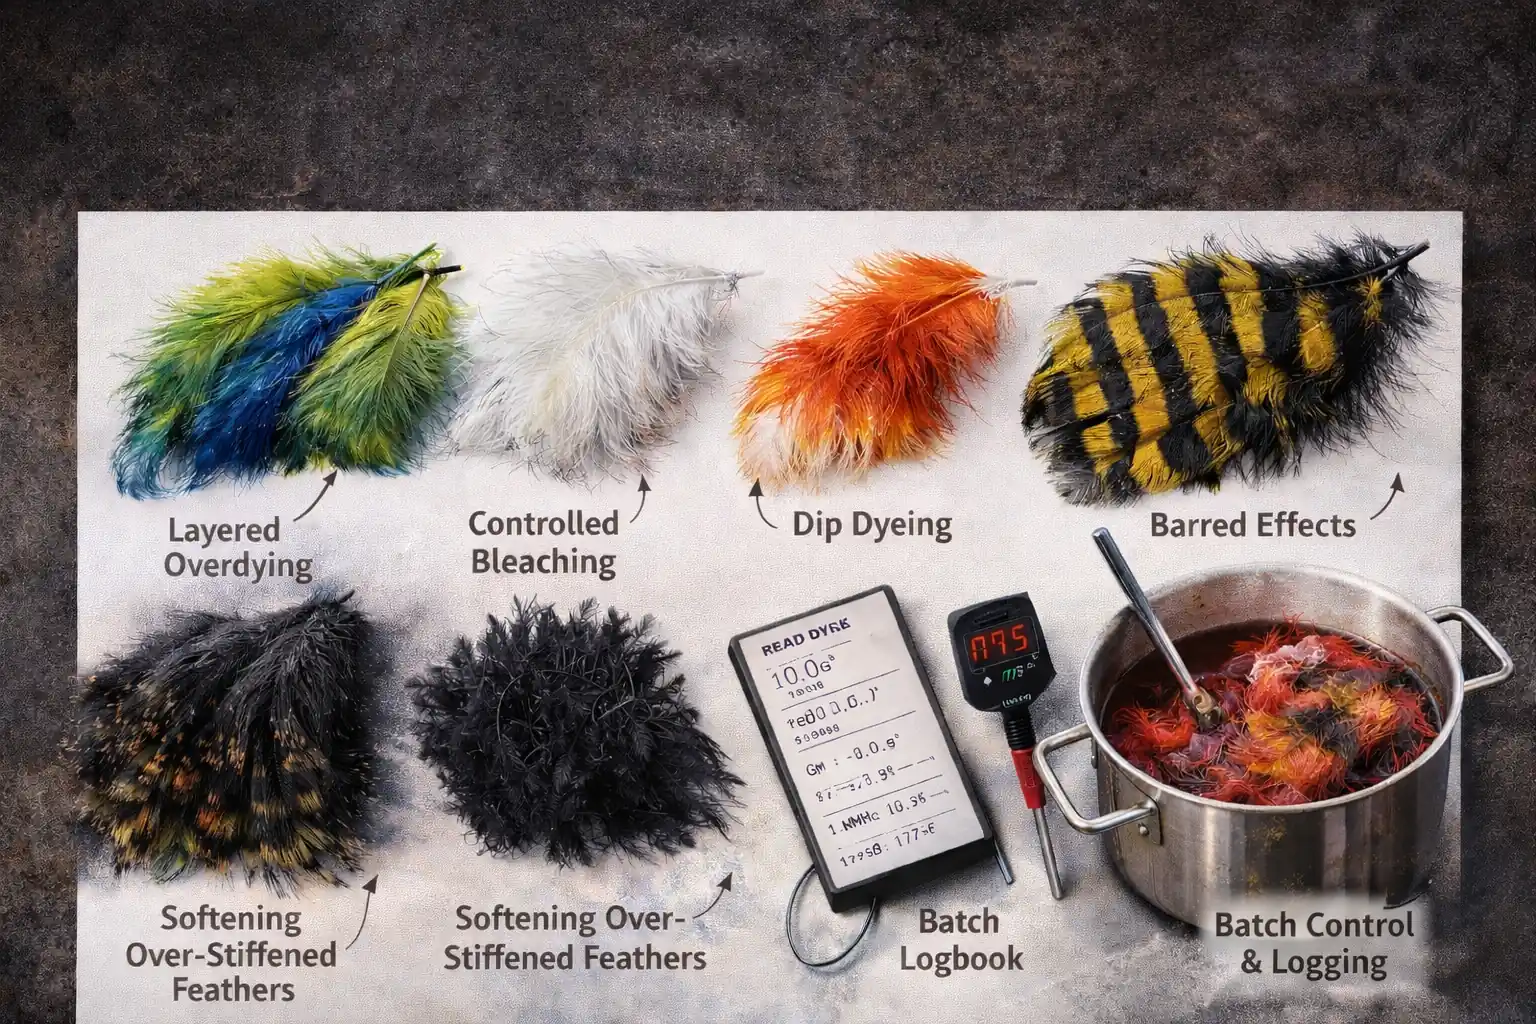
1. Layered Dyeing (Sequential Color Development)
Layered dyeing builds depth by applying color in controlled stages.
Method
- Complete first dye cycle and rinse
- Maintain feather moisture — do not allow full drying
- Prepare second dye bath at controlled pH (4.2–4.5) and 170–180°F
- Submerge fully and monitor closely
- Reduce dwell time by 30–50% compared to primary dye
Key Control Variables
- Second bath must be weaker concentration
- Temperature must remain stable (±2°F)
- Agitation must be gentle
Purpose: Add tonal depth, create undertones, modify saturation without over-softening fibers. Improper layering results in muddy color, fiber stiffness, and loss of natural taper.
2. Controlled Bleaching Before Dye
Bleaching is used to reset darker natural marabou or remove previous color. This must be controlled.
Approved Method
- Use hydrogen peroxide (3%–6%) diluted 1:1 with distilled water
- Maintain solution temperature below 120°F
- Soak 5–15 minutes depending on desired lift
- Rinse thoroughly
- Neutralize with mild vinegar rinse
- Proceed directly to dye while still damp
Risks: Excess bleaching weakens stems. Overexposure increases brittleness. Uneven lift causes patchy dye results. Bleaching is structural modification — treat it carefully.
3. Dip Dyeing for Contrast Tips
Dip dyeing creates bold tips or fade effects without overdyeing the entire feather.
Technique
- Prepare shallow dye bath
- Hold feather by stem
- Dip tip only 1–2 inches
- Maintain 170–175°F
- Dwell time: 30–90 seconds
- Remove and rinse immediately
Control
- Keep stem dry above dip line
- Avoid steam exposure on undyed portion
- Maintain consistent insertion depth across batch
Used correctly, this technique enhances streamer contrast, crappie jig tips, and spinner tail flash accents.
4. Creating Barred Effects
Barred marabou adds segmentation and visual triggers.
A. Physical Masking
Wrap thin rubber bands around feather, dye normally, remove bands post-rinse.
B. Alcohol Resist
Apply light alcohol brush lines before dye, dye as usual — resist areas remain lighter.
C. Overdye Striping
Dye light base, dry, apply darker stripes with controlled brush application. Barred effects should enhance natural movement — not overpower it.
5. Softening Over-Stiffened Feathers
If feathers become slightly stiff due to minor overheating or oversaturation, recovery may be possible.
Softening Protocol
- Rehydrate in warm distilled water (100–105°F)
- Add small amount of hair conditioner (non-silicone)
- Soak 3–5 minutes
- Rinse thoroughly
- Air dry with feather separation
This does not reverse structural damage from denaturation. It can improve minor surface stiffness only. Prevention is superior to correction.
6. Industrial Batch Consistency Methods
Advanced dyeing requires measurable repeatability.
Batch Standardization Includes
- Fixed water-to-dye ratios
- Fixed acid measurement
- Logged starting and ending pH
- Logged maximum temperature
- Logged dwell time
- Logged feather grade and stem class
- Dye exhaustion observation
Tolerance Standards
- Temperature fluctuation: ±2°F
- pH drift: ±0.3
- Dwell time variance: ±5 minutes
Professional dyeing is not visual guesswork. Consistency is achieved through recorded control.
Why Advanced Techniques Matter on the Water
Precision dyeing produces natural pulsing action, depth instead of surface brightness, controlled contrast, repeatable tone across batches, and reliable jig performance. Improper advanced techniques produce muddy undertones, flattened fibers, inconsistent action, and reduced durability.
Learning how to dye marabou feathers at this level means mastering control, not color alone.
Before applying these advanced techniques, it is critical to understand structured color formulation. If you have not reviewed Part 4 — Color Formulation & Custom Recipes, start there. That section explains how to build measured blends, control saturation, match forage species, and develop repeatable dye ratios. Advanced manipulation only works when the base color formula is precise and consistent.
Next — Part 6: Troubleshooting & Failure Analysis. In Part 6, we move into advanced problem-solving: diagnosing uneven penetration, correcting dull or muddy color, identifying pH drift patterns, fixing inconsistent batches, and preventing structural fiber failure. Mastery of how to dye marabou feathers requires knowing how to correct errors — not just prevent them.
Frequently Asked Questions About Advanced Marabou Dyeing
What is layered dyeing in marabou feather preparation?
Layered dyeing means applying color in sequential passes rather than one bath, building depth and complexity that a single dye application can’t achieve. Each layer is controlled separately, so the final color is built deliberately rather than left to chance.
How does controlled bleaching before dyeing change results?
Controlled bleaching strips natural pigment before the dye bath, giving dye a more uniform base to bond to. This is especially useful for achieving bright, saturated colors on naturally darker or unevenly pigmented feathers that would otherwise dye inconsistently.
Why do some marabou feathers turn out barred or striped?
Barred effects are created intentionally, using physical masking, alcohol resist, or overdye striping to block dye from reaching certain sections of the feather. Done correctly, this produces a controlled pattern rather than the blotchy, uneven result of an uncontrolled dye job.
Can over-stiffened marabou be softened after dyeing?
To a degree, yes — a softening protocol can help restore some flexibility to feathers that came out stiffer than intended. But this only goes so far; feathers damaged by excessive heat or prolonged alkaline exposure during dyeing can’t be fully recovered, so getting the original process right matters more than trying to fix it afterward.