Float Fishing for Trout: 6 Common Types of Bobbers / Strike Indicators Compared
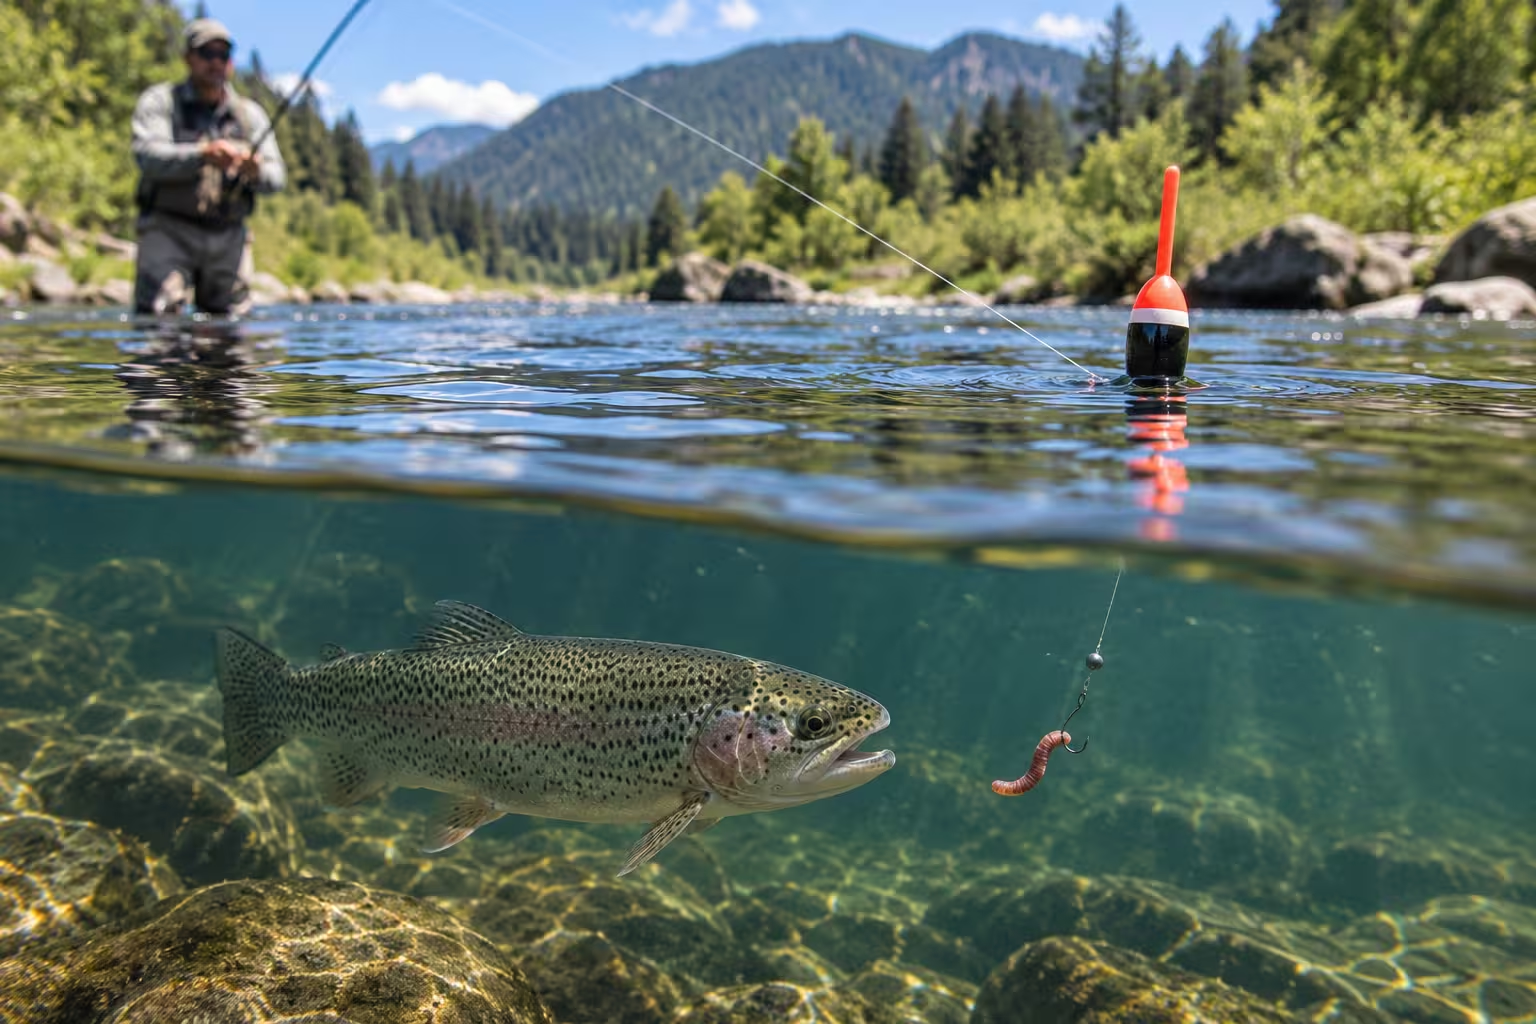
Bobber fishing for trout can look simple, but walk into any tackle shop or fly shop and you’ll find half a dozen different ways to suspend a bait or fly at a set depth — and most anglers just grab whatever’s closest without understanding how differently each one actually performs. The round clip-on bobber, the toothpick indicator, the pinch-on foam pad, two different styles of O-ring screw-top indicator, and the yarn indicator all solve the same basic problem — holding your bait at a target depth and showing you a bite — but they do it in genuinely different ways, with different trade-offs in resistance, adjustability, and casting behavior.
This guide breaks down all six, how to rig each one correctly, and when to reach for which. This is part of a complete trout fishing system that explains how depth, drift, and presentation work together. → Start with the complete trout fishing system
Why Float Type Matters in Bobber Fishing for Trout
A float isn’t just something that keeps your bait off the bottom and signals a bite — it controls how deep your bait sits, how naturally it drifts, and how easily you can change that depth mid-session as trout move. The six common float types handle these jobs very differently, and picking the wrong one for the water you’re fishing is one of the most common reasons anglers struggle with float fishing for trout.
The 6 Common Float Types for Trout
1. Round Clip-On / Push-Button Bobber — the classic red-and-white round bobber with a spring-loaded clip.
2. Toothpick-Style Foam Indicator — a foam teardrop float pegged to the line with a toothpick through its center hole.
3. Pinch-On Foam Indicator — a foam pad folded or pinched directly around the line by hand, no toothpick needed.
4. O-Ring Screw-Top, Line-Through-Center (OROS-style) — line threads through the hollow center of the float, and a screw cap compresses an O-ring against a post to grip it in place.
5. Air-Lock (O-Ring Screw-Top, Line-Held-at-Top) — same locking mechanism as above, but the line is gripped at a peg on top of the float rather than passing through the body, so the float hangs below the pinch point.
6. Yarn Strike Indicator — poly yarn looped onto the leader with a yarn tool and treated with floatant.
Type 1: Round Clip-On / Push-Button Bobber
How It Works
Press the button on top, a hook or peg opens at the bottom (and sometimes the top), you lay your line into the channel, and release. The float clamps at that exact point on the line and doesn’t move until you release it again.
How to Rig It
Step 1 — Decide Your Depth First. This float locks at a fixed point, so commit to a depth before casting.
Step 2 — Clip the Bobber at That Depth. Press the button, lay the line in the channel, and release.
Step 3 — Add Split Shot Below. Place split shot 6 to 8 inches above your hook to keep the bait down and help the float sit upright.
Step 4 — Tie On Your Hook. A size 8 to 12 light-wire hook is standard for trout. → See: How to Rig a Trout Worm
Strengths
Cheap, available everywhere, and requires zero setup knowledge — clip it on and fish. Highly visible at distance and in low light.
Limitations
Can’t slide freely, so casting deeper than roughly your rod length becomes awkward — you end up dragging slack line through the water. The hard plastic clip creates more resistance than a foam or yarn indicator, and light-biting or pressured trout can feel that resistance and drop the bait before you see the strike.
Best Used For
Shallow water, straightforward presentations, and situations where you’re not adjusting depth often — a strong choice for beginners and for skinny water at trout parks where the target depth is only a foot or two.
Type 2: Toothpick-Style Foam Indicator
How It Works
A foam float with a hole through its center. You push the line through the hole, then push a toothpick in alongside it, wedging the line in place through friction. Snap off the excess toothpick and you’re rigged.
How to Rig It
Step 1 — Thread the Line Through the Float.
Step 2 — Insert the Toothpick. Push it through the hole alongside the line, pinning it in place.
Step 3 — Trim the Toothpick. Snap it flush on both sides so it doesn’t catch on your rod guides.
Step 4 — Add Split Shot and Hook.
Step 5 — Set and Adjust Depth. To reposition, pull the toothpick, slide the float, and re-peg it.
Strengths
Genuinely adjustable without cutting or re-rigging, unlike the clip-on bobber. Softer foam body means less resistance and more sensitive strike detection.
Limitations
Repositioning takes a few extra seconds since you have to remove and reinsert the toothpick each time. The toothpick can work loose over a long drift or repeated casts.
Best Used For
Sessions where you expect to adjust depth multiple times — trout transitioning from shallow to deeper water, or actively searching for the right depth. → See: Where Stocked Trout Actually Feed
Type 3: Pinch-On Foam Indicator
How It Works
A foam pad, sometimes pre-slit or self-adhesive, that you fold or press directly around your line by hand — no toothpick, no threading. It holds through the foam’s grip and tackiness.
How to Rig It
Step 1 — Position the Pad at Your Target Depth.
Step 2 — Fold and Pinch. Fold the pad around the line and press firmly to seat it.
Step 3 — Add Split Shot and Hook.
Step 4 — Reposition as Needed. Unpinch, slide, and re-pinch.
Strengths
The fastest of the six to reposition — no toothpick to remove and reinsert. Extremely low-profile and light, giving some of the most sensitive strike detection of any float type here, valuable for light-biting or pressured trout. This makes it a natural fit for extremely light hook presentations — small flies, midges, and tiny jigs — where any added weight or resistance from the float would overpower the presentation itself.
Limitations
Holds by grip alone rather than a mechanical lock, so it can slip on slick or wet line, especially in current or with a heavier rig. Less visible at distance than a round bobber due to its small, low-profile shape.
Best Used For
Pressured or selective trout where minimizing resistance matters most, and sessions where you’re fine-tuning depth frequently and want the fastest possible adjustment. → See: Why Trout Follow But Don’t Bite
Type 4: O-Ring Screw-Top, Line-Through-Center (OROS-Style)
How It Works
The line threads straight through a hollow channel running through the center of the ball. A screw cap on top compresses an internal O-ring against a post, pinching the line at that exact point. Loosen the cap and the float slides freely to a new depth; tighten it back down to lock.
How to Rig It
Step 1 — Unscrew the Cap.
Step 2 — Thread the Line Through the Center Channel.
Step 3 — Slide to Your Target Depth.
Step 4 — Screw the Cap Down to Lock. Tighten until the O-ring grips firmly, but don’t overtighten — you’re compressing rubber against your line, not driving a screw into wood.
Step 5 — Add Split Shot and Hook.
Strengths
True slide-and-lock adjustability without removing anything from the line — loosen, slide, tighten. Because the line runs through the center, the float rides balanced and casts smoothly. Durable and reusable across many sessions.
Limitations
Slightly more setup than a clip-on bobber the first time you rig it. Overtightening can pinch and weaken the line over repeated adjustments if you’re not careful.
Best Used For
Anglers who want true slip-float adjustability with a secure, repeatable lock — strong for deeper water, tailwaters, and sessions where you’re searching multiple depths in the same outing without wanting to keep tying on new rigs.
Type 5: Air-Lock (O-Ring Screw-Top, Line-Held-at-Top)
How It Works
Same locking principle as the center-through style — a screw cap compresses an O-ring to pinch the line — but here the line is gripped at a peg on top of the float rather than passing through the body. The float hangs below the pinch point instead of riding centered on the line. Air-Lock is the most common trade name for this style.
How to Rig It
Step 1 — Unscrew the Top Cap.
Step 2 — Lay the Line Against the Peg.
Step 3 — Slide to Your Target Depth.
Step 4 — Screw the Cap Down. This compresses the O-ring against the peg and locks the line in place at that point.
Step 5 — Add Split Shot and Hook.
Strengths
Same slide-and-lock adjustability as the center-through style. Because the float hangs below the pinch point rather than being threaded through, many anglers find it faster to rig on the water — no need to feed the entire tag end of line through a channel.
Limitations
Because the float hangs off one point rather than riding centered on the line, it can sit slightly differently on the water than a true center-through float, which is worth being aware of if you’re fishing very light, finesse presentations.
Best Used For
Similar situations to the center-through style — deeper water, multiple depth changes in a session — with a slight edge in rigging speed, making it a strong choice when you’re changing depth frequently throughout the day.
Type 6: Yarn Strike Indicator
How It Works
A small tuft of poly yarn is looped onto the leader using a yarn tool, cinched tight with a slip knot, then trimmed and treated with floatant (powder or gel) to keep it riding high on the surface.
How to Rig It
Step 1 — Loop the Yarn Onto the Line using a yarn tool, at your target depth.
Step 2 — Cinch the Slip Knot Tight.
Step 3 — Trim the Yarn to your preferred size — smaller for subtlety, larger for visibility in faster water.
Step 4 — Treat with Floatant. Powder or gel floatant keeps the yarn buoyant and visible.
Step 5 — Add Split Shot and Hook.
Strengths
The lowest-resistance option of all six — yarn offers almost no drag against a biting fish, making it the most sensitive for detecting light takes. Also the most castable in tight quarters since it doesn’t have the bulk or weight of a hard plastic or foam float. Like the pinch-on foam indicator, yarn is built for extremely light hook presentations — its near-weightless profile won’t overpower a small fly or micro jig the way a heavier float would.
Limitations
Needs re-treating with floatant periodically as it waterlogs, especially in faster or choppier water. Repositioning means untying and retying rather than a quick slide-and-lock. Least visible of the six in low light or at long distance.
Best Used For
Highly pressured, selective trout in clear, calm water where resistance and visibility to the fish matter more than convenience — often paired with light spinning setups or fly gear on wild streams. → See: How Water Clarity Affects Trout Fishing
Side-by-Side Comparison
Depth Adjustment Speed: Clip-on bobber is slowest (unclip and reclip at a new point). Toothpick is moderate (remove and reinsert). Pinch-on foam is fast (unpinch and slide). Both O-ring screw-top styles are fast (loosen, slide, tighten). Yarn is slowest of all — requires retying.
Resistance / Strike Sensitivity: Clip-on bobber has the most resistance. Toothpick and pinch-on foam are lower. Both screw-top styles sit in the middle — low resistance in the water, though the compression point adds slightly more than plain foam. Yarn has the least resistance of the six.
Casting Deep Water: Clip-on bobber struggles past rod length. Toothpick, pinch-on, and both O-ring screw-top styles all handle deeper water well since they slide freely along the line before locking. Yarn works at any depth but takes longer to re-rig if you need to change it.
Visibility: Clip-on bobber is most visible at distance and in low light. Toothpick, pinch-on, and both screw-top styles are moderately visible depending on color and size. Yarn is the least visible of the six.
Ease of Use for Beginners: Clip-on bobber is simplest — no threading or pegging. Toothpick and pinch-on are straightforward. Both O-ring screw-top styles are easy once you’ve rigged one the first time. Yarn requires the most practice, since tying it correctly takes some repetition.
Cost: All six are inexpensive, typically a few dollars for a pack.
Which Floats Are Used in Fly Fishing vs. Spin Fishing
Five of these six originate from and are used almost exclusively in fly fishing, though two of those five work fine on spinning gear as well. The round clip-on bobber is the true outlier — it’s the default for spin and bait fishing, and rarely seen on a fly leader.
Fly Fishing Only:
Both of these exist specifically for extremely light hook presentations — small flies, midges, and micro jigs where a heavier float would overpower the presentation. Neither has enough weight of its own to cast on a spinning rod, so they’re essentially fly-fishing-only tools.
- Pinch-on foam indicator — fly shop standard, especially on light leaders where minimal resistance matters.
- Yarn strike indicator — a fly fishing technique through and through, tied onto the leader with a yarn tool.
Used in Both Fly and Spin Fishing:
- Toothpick-style foam indicator — a longtime fly fishing staple, sold by fly line companies like Cortland, but works equally well on a spinning setup.
- Both O-ring screw-top styles (OROS and Air-Lock) — designed and marketed for fly leaders and sold through fly shops, but the same slide-and-lock mechanism works just as well on spinning line.
Spin/Bait Fishing Only:
- Round clip-on bobber — the default for spinning rods, bait fishing, and trout park setups. Its size, weight, and resistance don’t suit a fly leader, which is why it’s essentially never used in fly fishing.
The practical takeaway: if you’re fly fishing for trout, your real choice is between all five non-clip-on options, based on resistance and adjustability needs. If you’re fishing spinning gear, the clip-on bobber is still the simplest and most common choice, though the toothpick and O-ring screw-top styles work just as well on spinning setups when you want more adjustability.
Matching Float Type to Trout Conditions
Freshly Stocked Trout, Shallow Water: A clip-on bobber works fine here, since freshly stocked trout are often aggressive and suspended shallow, and resistance matters less when fish are actively feeding. → See: When Stocked Trout Actually Eat
Trout That Have Moved Deeper After a Few Days: A toothpick indicator or either O-ring screw-top style is the better choice, since you’ll likely be searching through several depths to relocate fish that have spread out and moved to deeper holding water. → See: How Stocked Trout Behavior Changes After First Week
Pressured, Selective Trout in Clear Water: A pinch-on foam indicator or yarn indicator’s low resistance makes it the strongest choice when trout are inspecting bait carefully and dropping it at the first sign of unnatural resistance.
Deeper Tailwaters or Multiple Depth Changes in One Session: Either O-ring screw-top style (center-through or Air-Lock) is the strongest all-around choice — true slide-and-lock adjustability without re-tying.
Beginners or Kids Fishing: A clip-on bobber is the easiest to teach and use, and its high visibility makes bites easy to see and understand, even if it’s not the most sensitive option.
Common Mistakes Across All Six Float Types
Setting Depth Too Deep to Start. Regardless of float type, most anglers start too deep. Start shallow — 1 to 3 feet — and work down. → See: How to Choose Jig Head Weight for Trout for the same start-shallow principle applied to jig fishing
Overweighting with Split Shot. Too much weight sinks the bait and float too fast, working against the natural drift these floats are meant to provide.
Overtightening the O-Ring Screw-Top Styles. Cranking the cap down harder than necessary compresses the O-ring against your line more than it needs to, which can weaken or nick the line over repeated adjustments.
Not Re-Treating Yarn Indicators. A waterlogged yarn indicator sinks lower and becomes harder to see — refresh floatant regularly rather than fishing it soaked.
Casting Directly on Top of Holding Fish. Cast upstream of where you believe trout are holding and let current carry the float and bait naturally into the zone.
Ignoring Float Resistance in Pressured Water. In heavily fished water, extra resistance from a clip-on bobber can be the difference between a trout committing and dropping the bait. If you’re getting follows or soft takes you can’t convert, switching to a lower-resistance option is often the fix.
Building the Complete Presentation
Float type controls resistance and adjustability, but what’s under the float matters just as much. A soft, natural-falling bait pairs well with any of these six floats, because the float is doing the work of suspending it — the bait just needs to move naturally rather than fight the current.
This is exactly why a garlic-scented ribbed trout worm performs well under any of these float types in the first 24 to 36 hours after stocking — the float holds it at the right depth while scent does the work of triggering a strike from fish still feeding primarily by smell. → See: Garlic Scent for Trout
As trout become more selective over the following days, color and profile matter more, and float choice — particularly resistance and how naturally the rig drifts — becomes a bigger factor in converting follows into strikes. → See: Best Trout Worm Colors
Summary
There’s no single “best” float for trout — each of these six solves a different problem. The clip-on bobber is simplest and most visible but slowest to adjust and highest in resistance. Toothpick and pinch-on foam balance adjustability and low resistance. The two O-ring screw-top styles offer true slide-and-lock depth control for deeper or changing conditions. Yarn offers the lowest resistance and most sensitive strike detection, at the cost of speed and visibility. The core principle to remember: float weight and resistance should scale with hook and bait size — a heavy clip-on bobber on a tiny midge defeats the purpose of fishing light, the same way a light yarn indicator on a bulky bait would sink or drag unnaturally. Matching the float to the water, the presentation, and the trout’s mood is what turns float fishing from a guessing game into a repeatable system.
To understand how float fishing fits into the full approach, see the → complete trout fishing guide
Frequently Asked Questions About Trout Bobbers and Strike Indicators
What’s the easiest float to use for trout fishing?
The round clip-on bobber is the easiest for beginners — clip it on at your target depth and fish, no threading or pegging required. It’s also the most visible, which makes it a good choice for kids or anyone learning to read a bite.
Why do my trout keep dropping the bait when I use a bobber?
This is often a resistance problem. A hard plastic clip-on bobber creates more resistance than foam, yarn, or an O-ring screw-top indicator, and pressured or cautious trout can feel that resistance and let go before you see a bite. Switching to a lower-resistance option often solves this.
What’s the difference between the two O-ring screw-top styles?
Both use the same locking mechanism — a screw cap compressing an O-ring to grip the line. The difference is where the line is held: one threads through the center of the float (OROS-style), the other grips the line at a peg on top, with the float hanging below (commonly sold under the Air-Lock name).
Which float types work for both fly fishing and spinning gear?
The toothpick-style foam indicator and both O-ring screw-top styles (OROS and Air-Lock) all work well on either setup. The pinch-on foam pad and yarn indicator are essentially fly-fishing-only, since neither has enough weight of its own to cast on a spinning rod. The round clip-on bobber is used almost exclusively for spin and bait fishing.
Why can’t I cast a pinch-on foam pad or yarn indicator on a spinning rod?
Neither has meaningful weight of its own — on a fly rod, the weight of the fly line does the work of casting, but a spinning rod needs weight on the line itself to load the rod. Without that weight, these two float types just can’t be cast effectively on spinning gear.
How do I fish deep water with a clip-on bobber?
Clip-on bobbers struggle past roughly your rod’s length because the float can’t slide freely along the line. For deeper water, a toothpick indicator or either O-ring screw-top style is a better choice, since all three can be positioned anywhere along a longer stretch of line before casting.
Do pinch-on indicators fall off the line easily?
They can slip on wet or slick line, especially with a heavier rig or in stronger current, since they hold through grip rather than a mechanical lock. A toothpick-style or O-ring screw-top indicator will hold more securely.
What depth should I start at with any of these floats?
Start shallow, around 1 to 3 feet, especially for freshly stocked trout that often suspend near the surface. If you’re not getting bites, adjust depth before changing your bait.
Can I use these floats with a soft plastic jig instead of bait?
Yes. Suspending a small soft plastic or marabou jig under any of these six float types combines depth control with subtle jig movement, and works well in slower current or still water sections.
Recommended Next Reads
Best Baits and Techniques for Creek Fishing